How to Make an Origami Fish Step by Step Instructions
 If you are looking for a fun and creative activity, why not try making an origami fish? Origami is the art of paper folding, and it can be a great way to relax and unwind. Plus, the finished fish can be a beautiful decoration for your room or a lovely gift for a friend. In this article, we will provide you with step-by-step instructions on how to create your own origami fish.
To begin, you will need a square sheet of paper. You can use origami paper, which is specifically designed for this craft, or any other type of paper you have on hand. Start by folding the paper in half diagonally, forming a triangle. Make sure the edges are aligned before creasing the fold.
Next, take the bottom-left corner and fold it upwards, bringing it to the top point of the triangle. This will create a smaller triangle shape. Flip the paper over and repeat the same fold on the other side. Now, you should have a smaller triangle with a straight edge at the bottom.
Take the two upper corners of the triangle and bring them down to the bottom corner. The bottom edge should align with the straight edge created in the previous step. This will form a diamond shape. Be sure to crease the folds firmly to keep the shape in place.
Now, fold the bottom tip of the diamond up to meet the top point. You should have a smaller triangle shape once again. Make sure to crease the fold well. Next, fold the lower half of the triangle back down, leaving a small portion of the paper unfolded at the top. This will serve as the tail of the fish.
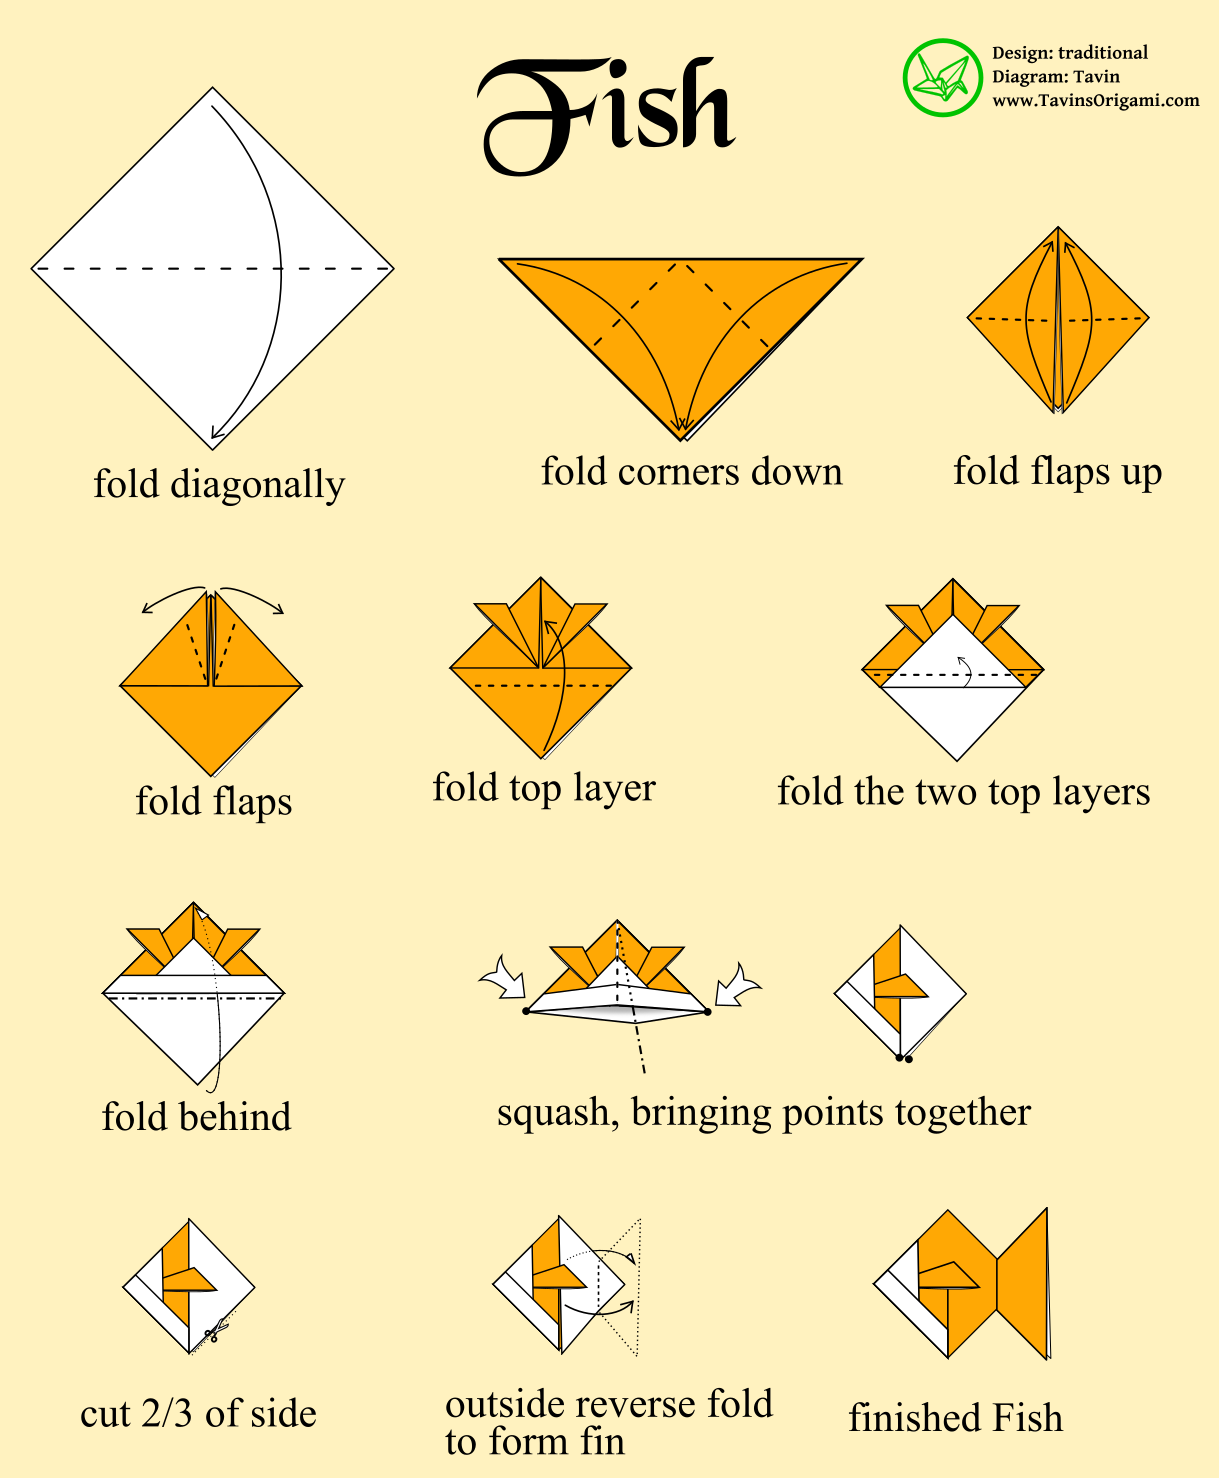 Now, let’s move on to the head of the fish. Take the top corner of the triangle and fold it down, bringing it towards the bottom point. Ensure that the fold aligns with the center line of the triangle. Crease the fold firmly before unfolding it.
Next, using the crease you just made as a guide, fold the bottom-left and bottom-right corners towards the center line. The edges of the corners should touch the crease, creating a kite shape. This will be the head of the fish. Flip the paper over and repeat the same fold on the other side.
Finally, to give your origami fish some life, draw an eye on the head. You can use a marker, pen, or pencil to create a small dot or oval shape. Be creative and add any additional details you like, such as scales or fins, using colored pencils or markers.
 That’s it! You have successfully created an origami fish. Display it proudly on a shelf or give it to a loved one as a thoughtful gift. Origami is not only a fun and relaxing activity, but it also encourages creativity and enhances fine motor skills. So go ahead and enjoy the art of paper folding!
If you are interested in exploring more origami creations, there are plenty of resources available online. Websites like Supercoloring and Tavin’s Origami offer a wide range of printable instructions for various origami designs, from animals to flowers and beyond.
 Origami is a traditional Japanese art form that has captivated people around the world. It is not only a creative hobby but also a way to relax and find inner peace. The step-by-step instructions provided in this article are just a taste of what origami has to offer. So why not give it a try?
Remember, the key to successful origami is patience and practice. Start with simple designs like the origami fish we just created and gradually move on to more complex ones. Soon, you will be able to impress your friends and family with your origami skills!